TL;DR
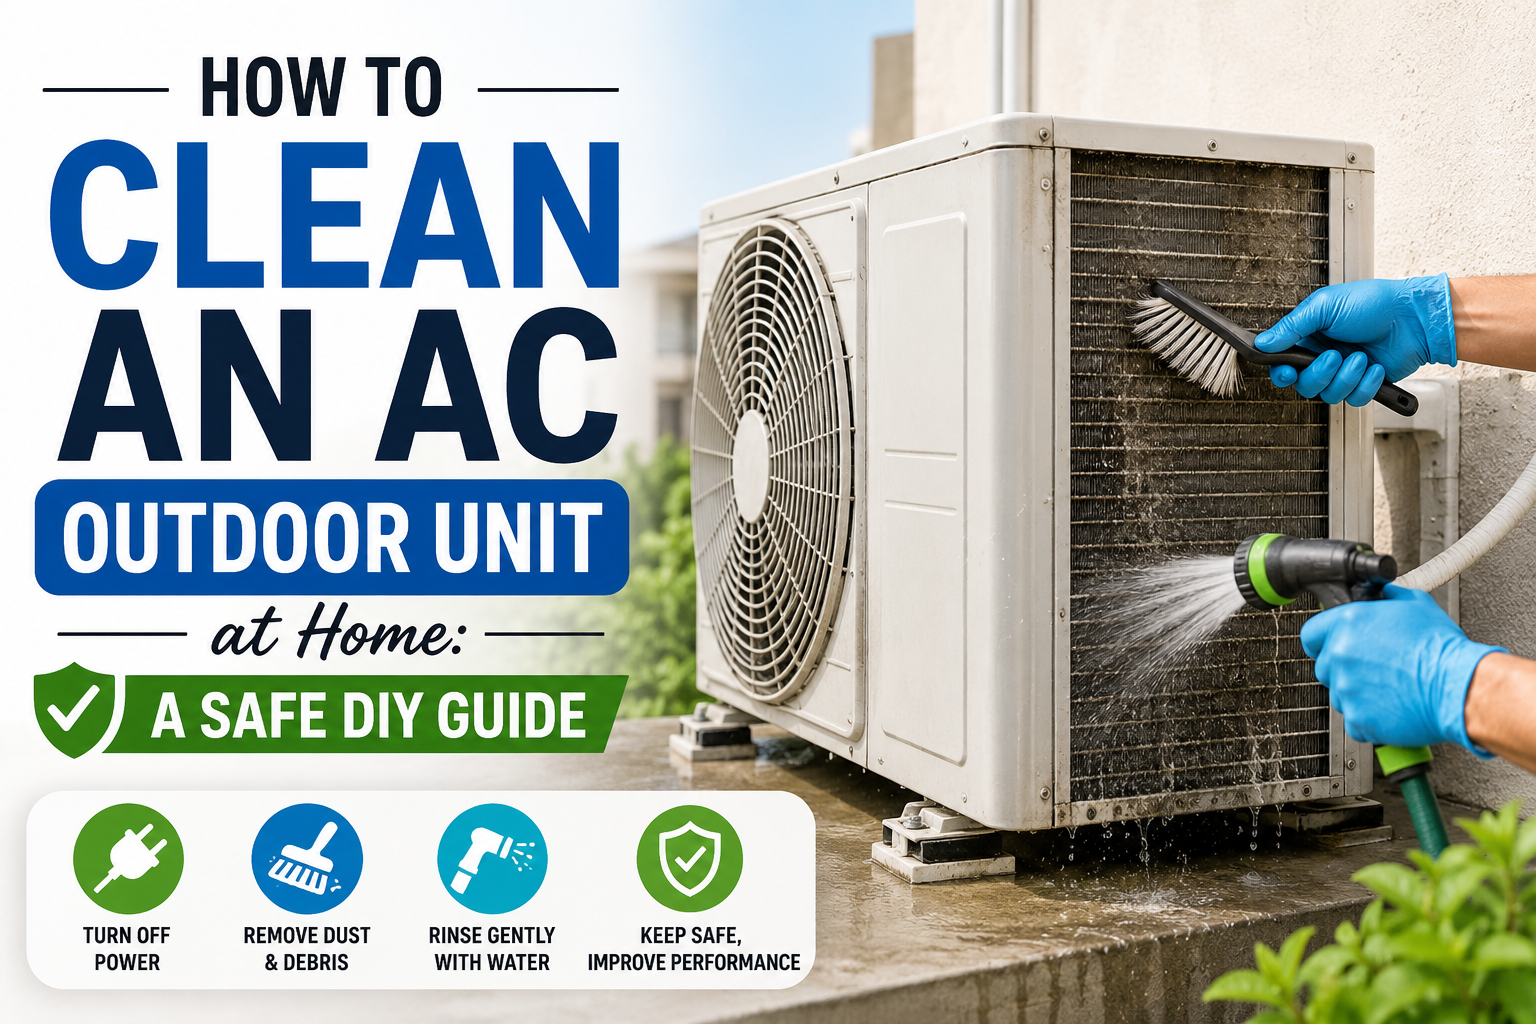
- Regular outdoor-unit cleaning can help maintain airflow when the condenser coil is clogged with dust, leaves or other debris.
- For most homeowners, switching off the AC and power, removing loose debris, gently brushing the coil and rinsing with low-pressure water is the safer DIY approach.
- A soft cleaning brush, fin comb and low-pressure sprayer are more useful than a high-pressure washer for routine cleaning.
- Never spray water into the electrical/control section, bend the delicate aluminium fins or attempt refrigerant/electrical repairs yourself.
- If the outdoor unit is difficult to access, badly damaged or heavily contaminated, professional servicing is safer than DIY cleaning.
Introduction
The outdoor unit of a split AC spends its life exposed to dust, pollution, leaves and moisture. Over time, debris can accumulate around the condenser coil and restrict airflow, which is one reason regular outdoor-unit cleaning matters.
The good news is that basic surface cleaning can often be done at home if the unit is safely accessible. The important part is knowing what you can clean yourself and where to stop.
This guide explains how to clean an AC outdoor unit without unnecessarily damaging the condenser fins, electrical components or the casing.
What You Need to Clean an AC Outdoor Unit
You do not need an expensive collection of equipment. For normal household cleaning, keep the following items ready:
- Soft coil-cleaning brush or soft-bristle brush
- Fin comb if some condenser fins are visibly bent
- Garden sprayer or another low-pressure water source
- Microfibre cloth
- Small vacuum or blower for loose dry debris
- Bucket of clean water
- Gloves and eye protection
- Screwdriver only if your AC manufacturer’s instructions specifically require removal of an accessible cover
A vacuum cleaner or blower can be useful for removing loose dust and leaves before introducing water. Amazon also carries various vacuum and cleaning products for home maintenance.
Do not treat a pressure washer as a default AC-cleaning tool. Excessive water pressure can bend condenser fins and may force water into areas where it does not belong.
Before You Start: Switch Off the AC Properly
This is the most important step.
Top Picks for This Article
Handpicked from across DealPaglu — prices and offers may change.


1. Turn off the AC from the remote
Switch the air conditioner off normally and wait for the outdoor fan and compressor to stop.
AC Cleaning Foam Spray 600ML | Heavy Duty Coil Cleaner for Split & Window AC | No-Rinse Formula | Removes Dust, Bacteria & Odor | Improves Cooling & Airflow | Safe on Fins & Coils | For Home & Car AC
No-rinse foaming coil cleaner for split and window AC outdoor units; removes dust and grime from the condenser coil without soaking the fins.
2. Isolate the electrical supply
Before touching the outdoor unit, switch off the relevant electrical supply/isolator or MCB according to your home’s setup and the manufacturer’s instructions.
Do not rely only on the remote control. The outdoor unit contains electrical components, so cleaning should never be performed while it is energised.
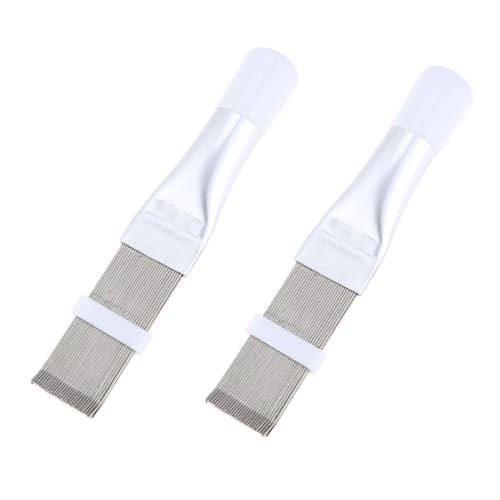
Air Conditioner Fin Comb, AC Condenser Fin Straightener Cleaner Evaporator Radiator Fin Cleaning Tool Pack of 1
A/C fin comb that straightens bent condenser fins and clears debris caught between them - a staple for safe AC outdoor-unit maintenance.
3. Let the unit settle
Give the unit some time before starting. You want the fan to have completely stopped and the electrical system to be safely isolated.
If you are unsure which electrical switch controls the AC, do not guess. Get an electrician or AC technician to identify it.
Step-by-Step: How to Clean the AC Outdoor Unit
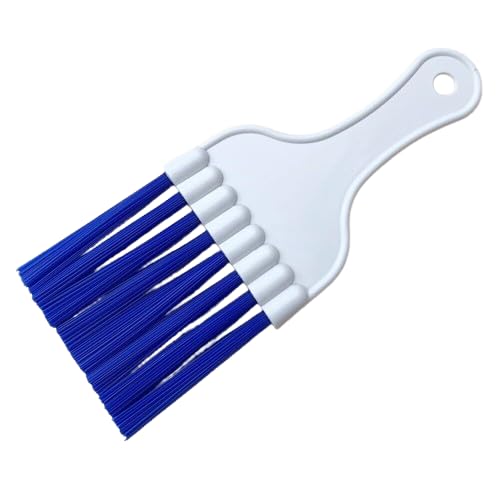
Flymaster Air Conditioner Condenser Fin and Refrigerator Coil Cleaning Whisk Brush
Soft-bristle coil whisk brush that gently loosens dust and lint packed between the outdoor unit's condenser fins before you rinse.
Step 1: Inspect the Outdoor Unit
Look at the unit before cleaning.
Check for:
- Leaves, paper and other debris
- Heavy dust on the condenser coil
- Mud or dirt around the base
- Bent condenser fins
- Corrosion
- Damaged wires or insulation
- Unusual oil-like residue
- Physical damage to the casing
If you notice damaged wiring, exposed electrical components, refrigerant leakage or significant corrosion, stop the DIY job and arrange professional service.
Step 2: Remove Loose Debris by Hand
Start with the easiest dirt.
Remove leaves, twigs, plastic and other loose material around the outdoor unit. Do not poke objects deep into the coil or fan area.
For dry dust, a soft brush or vacuum can help remove loose material without immediately turning the dirt into mud.
Step 3: Clean the Condenser Coil Gently
The condenser coil is one of the main areas that needs attention.
Use a soft brush and work gently in the direction of the fins. Avoid aggressive scrubbing because the thin aluminium fins can bend easily.
If the coil is only lightly dusty, dry brushing may be enough. There is no need to use chemical cleaner every time.
Step 4: Rinse With Low-Pressure Water
If the coil needs deeper cleaning, rinse it gently with clean water.
The objective is to wash dust and dirt away—not blast the coil with force.
A gentle spray is preferable to a high-pressure jet. Professional coil-cleaning guidance also emphasises that excessive pressure can be problematic, particularly with delicate coil designs.
Work systematically across the coil rather than concentrating a strong jet on one small area.
Step 5: Keep Water Away From Electrical Sections
This is where DIY cleaning requires care.
Do not deliberately spray water into:
- Electrical control boxes
- PCB/control areas
- Exposed electrical connections
- Motor/electrical compartments
- Wiring junctions
The condenser coil can be rinsed, but the entire outdoor unit should not simply be soaked indiscriminately.
If you cannot identify the electrical section safely, limit yourself to external dry cleaning and arrange professional servicing.
Step 6: Check the Condenser Fins
After cleaning, inspect the fins.
They should generally appear reasonably straight and unobstructed. If a small area has bent fins, a correctly sized fin comb may help straighten them carefully.
Do not force the fins back into position. Excessive pressure can make the damage worse.
Step 7: Clean Around the Outdoor Unit
The area surrounding the AC also matters.
Remove leaves, weeds, dust and other objects that restrict airflow around the unit. Keep the air path around the outdoor unit reasonably clear.
The purpose is not to make the casing look spotless; it is to maintain good airflow around the condenser.
Step 8: Allow It to Dry and Restore Power
Once cleaning is complete, allow water to drain away and the accessible surfaces to dry.
Restore power only after you are satisfied that the cleaning is complete and there is no standing water around electrical areas.
Then switch the AC on and listen for anything unusual.
How Often Should You Clean the Outdoor Unit?
There is no universal cleaning interval that suits every home.
A relatively clean outdoor unit in a low-dust environment may need less attention, while an AC exposed to road dust, construction dust, pollution, trees or heavy seasonal debris can require more frequent inspection.
Instead of blindly following a fixed schedule, inspect the unit periodically and clean it when significant dirt begins restricting airflow.
Amazon’s own AC guidance recommends keeping an eye on dust and debris around outdoor units because accumulated material can obstruct airflow and affect efficiency.
Should You Use AC Coil Cleaner?
Not necessarily.
For routine household dust, water and gentle mechanical cleaning may be sufficient. A chemical coil cleaner is more appropriate when there is stubborn contamination that cannot be removed effectively with normal cleaning.
If you use a chemical product, follow its instructions carefully, including the correct dilution and rinsing requirements. Using an unnecessarily strong concentration can damage coils, and chemical cleaning generally requires thorough rinsing.
For a mildly dusty outdoor unit, starting with chemicals is often unnecessary.
Do You Need a Pressure Washer?
For most homeowners, no.
A pressure washer can make cleaning appear faster, but the pressure can bend delicate condenser fins or cause water to enter areas where it should not.
If you already own a pressure washer, resist the temptation to use its strongest setting directly against the condenser coil.
For routine DIY maintenance, a low-pressure sprayer is the safer choice.
Useful AC Cleaning Accessories
Amazon lists AC-related accessories such as fin comb sets and coil-cleaning liquids, which can be useful when you actually need them.
Soft Cleaning Brush
Best for: Routine dry cleaning.
Choose a brush with soft bristles that can remove dust without aggressively catching the aluminium fins.
Fin Comb
Best for: Small sections of bent condenser fins.
A fin comb is a specialised tool rather than a general cleaning brush. Match it to the fin spacing and use it gently.
Check AC fin combs on Amazon India
Coil Cleaning Brush
Best for: Dusty condenser coils.
A dedicated coil brush can make it easier to work across the fins without using excessive force.
Check AC coil cleaning brushes on Amazon India
Low-Pressure Sprayer
Best for: Controlled rinsing.
A basic sprayer can be more appropriate for household AC maintenance than a powerful pressure washer.
Check low-pressure cleaning sprayers on Amazon India
Important: What You Should Not Clean Yourself
Cleaning the external condenser coil is very different from servicing the refrigeration system.
Do not attempt DIY work involving:
- Refrigerant charging
- Refrigerant-line repairs
- Compressor replacement
- Electrical fault diagnosis
- PCB repair
- Capacitor replacement if you are not qualified
- Refrigerant leakage repair
- Cutting or opening sealed refrigeration lines
These jobs require appropriate tools, knowledge and safety procedures.
If the AC is not cooling properly after a thorough external cleaning, do not automatically assume that more cleaning will solve the problem.
Common DIY Mistakes to Avoid
Using a High-Pressure Jet
This is one of the easiest ways to damage delicate fins.
Better approach: Use gentle water flow and let the water do the cleaning.
Brushing Too Hard
Condenser fins can bend surprisingly easily.
Better approach: Use light pressure and work patiently.
Spraying the Entire Unit
The outdoor unit contains electrical components.
Better approach: Target the dirty coil and external surfaces while keeping electrical sections protected.
Cleaning Without Isolating Power
Never start cleaning an electrically connected outdoor unit simply because the AC is switched off from the remote.
Better approach: Properly isolate the electrical supply first.
Using Strong Chemicals for Ordinary Dust
More chemical does not automatically mean better cleaning.
Better approach: Start with dry cleaning and water; use a suitable coil cleaner only when genuinely necessary.
Ignoring Bent Fins
Even a clean coil can have airflow problems if sections of the fins are badly damaged.
Better approach: Inspect the fins after cleaning and use an appropriate fin comb carefully for minor damage.
When Should You Call an AC Technician?
DIY cleaning is appropriate only when the outdoor unit is safe and easily accessible.
Call a professional if:
- The unit is installed at a dangerous height
- You need to climb onto a roof or ledge
- Wiring looks damaged
- You see oil-like residue around refrigeration connections
- The coil is heavily corroded
- The fins are extensively damaged
- The AC has a refrigerant problem
- The compressor or fan is behaving abnormally
- The AC still performs poorly after cleaning
- You are unsure how to isolate the electrical supply
Do not risk a fall just to save the cost of a cleaning visit. Accessibility and personal safety should come before DIY savings.
Does Cleaning the Outdoor Unit Improve Cooling?
It can help when dirt and debris are restricting airflow through the condenser coil.
However, cleaning is not a universal cure for poor cooling. Weak cooling can also result from refrigerant problems, electrical faults, compressor issues, indoor-unit problems, airflow restrictions and other faults.
Think of outdoor-unit cleaning as routine maintenance—not a replacement for AC servicing when the system has an actual fault.
How to Clean an AC Outdoor Unit Without Damaging It
The safest DIY method is simple:
- Switch off the AC.
- Isolate the electrical supply.
- Remove leaves and loose debris.
- Gently brush loose dust from the condenser coil.
- Rinse the coil using low-pressure water.
- Keep water away from electrical/control sections.
- Check the fins and straighten minor damage carefully if appropriate.
- Clean the surrounding area so airflow is not obstructed.
- Allow excess water to drain and the unit to dry.
- Restore power and test the AC.
The key is gentle cleaning rather than maximum pressure.
Final Verdict
Cleaning an AC outdoor unit is a reasonable DIY maintenance job when the unit is safely accessible and only needs basic dust and debris removal. A soft brush, gentle water spray and occasional fin comb are more useful for most homes than aggressive pressure washing or excessive chemical cleaning.
If the outdoor unit is at height, has damaged wiring, heavy corrosion or a suspected refrigeration/electrical fault, leave the job to a qualified technician.
For routine maintenance, focus on the condenser coil, airflow and surrounding debris—and avoid turning a simple cleaning job into an expensive repair.